Showing posts with label you can make it beautiful. Show all posts

Friday, 4 April 2014

DIY - Happy Plant - Succulent Glass Jar Planter - Roots and Leaves


I am enamoured by plants in glass jars, especially succulents. There's something about the light shining through the glass, and being able to see all the soil and rocks. Today I'm posting a DIY so that you can share in these beautiful planters.


You need soil, jars and rocks...oh and a plant of course! Any small plant will generally work, except cacti which can't abide the humidity.

Do a layer of rocks at the bottom of the jar, for drainage. Then the soil and plant. Because these are succulents (which don't like to get wet) I added a layer of rocks just below the leaf level. Not only does it help with the plant's health, but it also cleans up the top layer and makes it look nicer. 


Succulents don't like their leaves to be wet, or they rot, so make sure that the jar is big enough that the plant isn't touching the sides. This way condensation won't hurt your plant. You can keep the lid on sometimes, but make sure to take it off sometimes too to air the plant out. 

Place it in indirect sunlight, because of the glass direct sunlight will be amplified and you may end up frying your plant! Sunlight is good, but not for more than an hour or two a day. 

Monday, 31 March 2014

You can make it beautiful - Birthday in a Card


So your friend lives in a different city and you're kind of broke but still want to send her something for her birthday to show you miss her and you care? That's the situation I found myself in when my BFF turned 31. What was I going to do?

Well a birthday in a card of course! I made this fun image to put on the front of her card using a fun chalkboard I had. I wanted some kind of pop up inside but alas, it just wasn't to be. 


I filled a small baggy with glitter and sparkles and sequins for confetti and added in these awesome candles I got from Target. 


I bought my friend a few small things for her birthday - a face mask, a chocolate bar and some tea. Everything I think that makes a birthday awesome! Think about what your friend would enjoy on their birthday that is both flat so that it can fit in an envelope and fun!


And really that's it! Super simple but enjoyable. What would you put in a birthday in a card?

Monday, 24 March 2014

You Can Make it Beautiful - DIY - Afterlight - The awesome photo app I am now addicted to

Found a new photo app that I am very much in love with. Afterlight - super powerful and also super easy to use. It includes all the standards such as brightness, contrast and saturation. It also includes some great options such as highlight/middletone/shadow color tones so you can get rid of unwanted yellow tones, or just make the photo more blue toned for a professional look. Afterlight even includes a temperature option that can quickly spruce up any photo. 

Afterlight also includes a huge amount of great filters to use! (Some options below)


Another cool part is the masks it allows you to make, with shapes and also letters. 
(My favorite letter below!)


The masks also include a set of neat wallpapers to use instead of plain white. At  this point you can also change the size of the mask as well, so it's a bit of a smaller C below.


Basically it's a great app, with so many options. Other things you can do are an easy vignette 
setting and grain. 


My favorite part of this app is the cool light leaks option, with more than a dozen cool light leaks you can apply to your photograph. That and the instant film options can really create a unique and beautiful photo in a bit of an artistic way.


The best part of the app is at the end, when you can save to camera roll, upload to instagram, FB etc, as well as send it as a RL postcard using Sincerely. It basically makes it super easy to share.


Thursday, 20 March 2014

You can make it Beautiful - Painted Fork Plant Stakes DIY


I want to say this came to me in a dream but it actually came to me during a night when I couldn't sleep so I guess it came to me in a not-dream? Anyways I was excited to try it out. 


Crystal and I bought these lovely forks at a thrift shop but didn't have a use for them right away so I commandeered five. In my vision I wanted the paint to be a light turquoise/mint color which I ended up having to mix. 


I painted them with two coats in a kind of half hazard way. I didn't want them to look super perfect, more whimsy and charming. I left enough room to write the plant names. 


I embassingly actually had to look up a couple of my plants. Who knew I had a goosefoot? Definitely not me! At least this is the last time I have to look it up since now I can refer to my handy dandy plant stakes. 


Stick them tongs down into the dirt. Gotta warn you that they shouldn't get wet as the paint may come off, depending on what you use. But they add a little bit of fun to any plant and what a great gift!


What color would you paint yours? A dark red would offset the green of the plant. Or maybe a blue. What's your favorite?

You Can Make it Beautiful - Hello Spring Cards


Last year I sent out homemade cards for Valentines Day. I wasn't on the ball this year and so I was thinking of what the next holiday would be a good one to send something out. Maybe Easter? St Patricks Day? Then I thought how much I love spring and want to share that with people who are special to me. 


Step one was gathering supplies. I chose a yellow palette with some gold and purple accents. I knew I wanted to use the Hello stamp from Elise and had plans to use the gold letters but they never really worked out. 


Step two was taking a photo. I actually thought I had a perfect photo but when I printed it out, it didn't work. On my lunchtime walk one day I came across these gorgeous bulb blooms that I knew would work perfect for the cards. 


Step three: Assembling. I added some washi tape and staples and glued and pasted these together. I loved how they were all a little different yet were cohesive. 


Step four is about the backs/message. On the backs I added the stamp and a little more washi tape as well as a fun little message. Everyone got the same message mostly. It's not like they'll see each other's! 


Step five: Envelopes. I wasn't going to leave these plain. I feel like they needed to hint at what's inside so I added another stamp from Elise, this one Love. Add a little washi and heart sticker and it's perfect. 


What holiday could you make cards for your friends? Easter is coming up, or Mother's Day. Or be wild and just do a Happy Friday card. In this world of electronics, we all still love getting mail! 

Wednesday, 12 March 2014

You Can Make it Beautiful - Camera Tassel DIY


So I want to take my beloved Instax camera with me on my trip (yay!-Portland!) but the camera needed a little spricing up. Who wants a boring camera strap when you can have a fancy camera tassel?


Presenting five simple DIY camera tassels! Now the problem is which one do I use on my trip?


To make Western Rustic Star Tassel:
Cut a piece of leather (I used an old coat) and sew on a beautiful button, snap or other fun adornment. Use embroidery thread to sew a simple yet stunning design (I chose three little x's). For the loop I braided some matching embroidery thread and tied it in a knot. And voila!


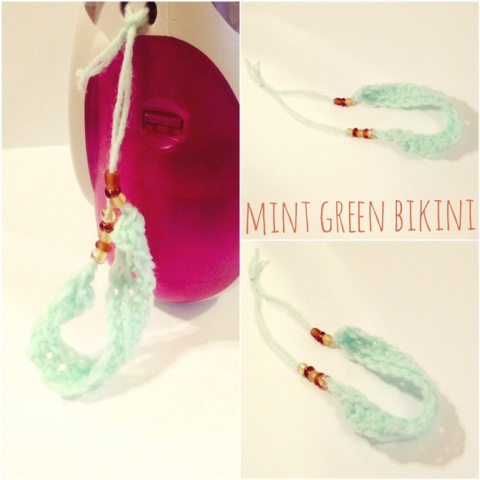
To make Mini Green Bikini Tassel:
Use a thin yarn and chain approx 20 then do about three or four single crochet rows, depending on how thick you want. Add on some gorgeous glass beads and tie a knot. Love it!


To make Spotted Owl Tassel:
Collect feathers of different kinds or patterns. Gather the tops together and wrap some rustic yarn around them, tying it off securely after making one large loop. Beautiful!


To make Polka Square Tassel:
Find two matching size wooden squares (I used old Scrabble tiles). Put the string between them and glue them together. Get out your favorite washi or other decorative tape and cover the outsides. Lovely!!


To make Golden Blue Treasure Tassel:
Get a small wooden block and tape off two sides diagonally. Paint the whole thing a single color, allow to dry and then after taking off the tape, paint the two previously covered sides a bright beautiful color. Add a screw in hook with some string and you're done!


Enjoy making your tassels!! Which one is your favorite? 


Tuesday, 11 March 2014

Five Ideas for Panoramic Shots ~ DIY - You can make it beautiful

Panorama photographs can be breathtaking! These shots I took today, high on a mountain above the city. The sky was perfect, and gorgeous lighting. The small clouds made beautiful random shadows on the hills, and the sea was turquoise.

Here's a few ideas for your own panoramic shots.

~Use the horizon as a way to level your shot. Keep it in the center the whole way around and you end up with a picture perfect photo.

~Try a shot without the land in it. Go for the sky! A long beautiful sky shot with variable clouds will be a unique and gorgeous photo, as well as a great spot to add text or icons.


~ Look for the light. The sun shining through clouds will make a beautiful shot, and who doesn't love a lens flare? Watch out though, if you start on the sun side of the sky then the camera won't be able to adjust for the rest of the sky, and it will become darker. Personally I love the above shot, with the contrast between brights and darks, but you may not want that effect.


~Include some close up landscape elements with the far away ones, such as rocks and trees close to you along with far away hills and mountains. It keeps things interesting and gives your photos a focus point. 

~Watch where you step! Don't get so caught up in the shot that you spin around and trip over your own feet! (Not saying this happened to me...)

Monday, 3 March 2014

You can make it beautiful - Painted Waffle Form DIY


Want a great way to brighten up your kitchen with a kitschy or vintage item? Follow this simple do it yourself - 


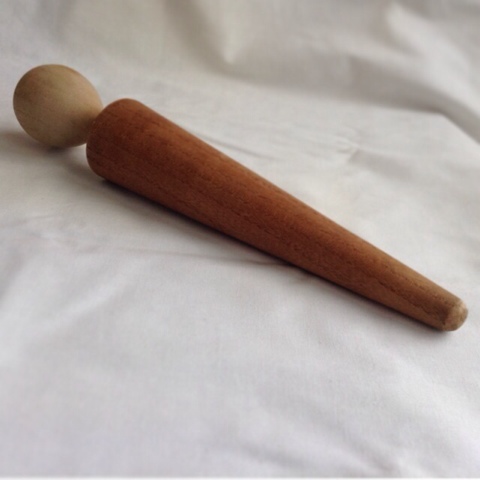
A couple of weeks ago Crystal and I were in a thrift store and came across this gem. It's prob one of my favorite items I've ever found and that's saying something. I think the simple mess of it and the smooth lines make it lovely - but that doesn't mean us can't be improved. 


Gather your supplies. I went with a Neapolitan ice cream theme to go with the waffle cone. I love how these colors look together. I made an Adobe Kuler palette which you can use if you'd like too, found here. 


I studiously painted the waffle form. This is a great part because you can figure out what kind of stripes and such you want. Get creative!


And voila! A beautiful painted waffle form with scalloped edges. Perfect for decorating a lovely kitchen or cafe.


What color would you paint your waffle form? Maybe your favorite ice cream flavour - mint chocolate chip (brown and sea green), strawberry (reds and pinks) or even sherbet (orange, yellow and pink)? Let me know what you'd choose!